Wanjiku Ventilator  DIY Using a Car Window Motor

Wanjiku Ventilator DIY Using a Car Window Motor

For construction of the ventilator, we need:

  • A piece of light metal arm.
  • A flat piece of wood
  • A car window motor
  • Apiece of “shock absorbers”

Assembling the parts together:

  1. Cut the metal arm to a desired length, used to press the Ambu bag.
  • The metal arm is fastened on the motor as shown below:
  • Get the correct position on the board and mount the motor.
  • Mount the piece of shock absorber to get the base for the Ambu bag
  • After assembling the parts together:

For rotating the dc motor we need to connect the Arduino circuit.

The components required are as follows:

  • Arduino Uno
  • VHN3SP30 dc motor driver
  • Potentiometers
  • Breadboard and Jumper wire
  • 12v 2A Adaptor

The VNH3SP30 is a full bridge motor driver intended for a wide range of automotive applications. Check out its datasheet for more info: https://www.sparkfun.com/datasheets/Robotics/vnh3sp30.pdf

The complete circuit connection diagram is as shown below:

Connection description:

  1. 5V and GND from the driver connected to 5V and GND terminals of the Arduino. 
  2. The EN, IN A, IN B and PWM  pins of the driver are connected to pins ~2,~3, 4 and ~6 of the Arduino.
  3. OUT A and OUT B of the driver are connected to the motor.
  4. +VE and -VE of the driver connected to power supply.
  5. The wipers of the potentiometers connected to pins A0 and A1 of the Arduino. The other two pins of the potentiometer to 5V and GND.

Here’s the Arduino circuit connection diagram:

The total Cost of assembling the ventilator is less than KES 20, 000 .

For commercial production or incase one needs us to assemble the ventilator for them you can reach us on below contacts.

“Wanjiku” Ventilator Do It Yourself (DIY) Using a Stepper Motor

“Wanjiku” Ventilator Do It Yourself (DIY) Using a Stepper Motor

Making a DIY Ventilator using a stepper motor.

For construction of the ventilator, we need:

  • A piece of wood
  • A hinge
  • A stepper motor bracket
  • Apiece of “shock absorbers” 
  • NEMA 17 Stepper motor

Assembling the parts together:

  1. Cut the wood in two pieces as desired to make the pressing arm and the base of the ventilator. 
  1. Hinge the pieces of wood together one side.
  1. Cut a piece of “shock absorber” and place it on the wood as a base for the Ambu bag.
  1. After assembling the parts together and mounting the stepper motor

For rotating the motor we need to connect the Arduino circuit.

The components required are as follows:

  • Arduino Mega 2560
  • A4988 Motor driver module with heat sink
  • Potentiometers
  • 100µF capacitor
  • Breadboard and Jumper wires
  • 12v 2A Adaptor.

The A4988 driver controls the bipolar stepper motor using the steps and direction pins. Check out its data sheet for more info: https://www.tme.eu/Document/25459777e672c305e474897eef284f74/POLOLU-2128.pdf

The electrical connections are as shown in the complete circuit schematic below:

Connections description:

  1. VDD and GND pins from the driver connected to 5V and GND of the Arduino.
  2. A1 ,B1 ,A2 ,B2 pins of the driver are connected to the stepper motor.
  3. VMOT and GND of the driver to power supply with the 100µF capacitor in between the two terminals for decoupling.
  4. STEP and DIR pin of the driver to pin 8 and 9 of the Arduino.
  5. The wipers of the potentiometers connected to pins A0 and A1 of the Arduino. The other two pins of the potentiometer to 5V and GND.
  6. Connect RST and SLEEP pin on the driver.

Here’s the Arduino circuit connection diagram:

The total Cost of assembling the ventilator is less than KES 20, 000 .

For commercial production or incase one needs us to assemble the ventilator for them you can reach us on below contacts.

“Wanjiku” Ventilator Do it yourself (DIY) using a Direct Current (DC) Motor

“Wanjiku” Ventilator Do it yourself (DIY) using a Direct Current (DC) Motor

For construction of the “Wanjiku”ventilator using direct current(DC) motor we need:

  • A piece of wood
  • A hinge
  • A dc motor bracket
  • Apiece of “shock absorbers”
  • DC motor.

Assembling the parts together:

  1. Cut the wood in two pieces as desired to make the pressing arm and the base of the ventilator. 

`

  1. Hinge the pieces of wood together one side.
  • Cut a piece of “shock absorber” and place it on the wood as a base for the Ambu bag.
  1. After assembling the parts together:

For rotating the dc motor we need to connect the Arduino circuit.

The components required are as follows:

  • Arduino Duemilanov
  • DRV8871 dc motor driver
  • Potentiometers
  • Breadboard and Jumper wire
  • 12v 2A Adaptor

The DRV8871 device is an optimized 8-pin device for driving DC motors with 6.5 to 45 V and up to 3.6- A peak current. Check out its data sheet for more info: http://www.ti.com/lit/ds/symlink/drv8871.pdf?&ts=1589266356250

The electrical connections are as shown in the circuit diagram below:

Connection description:

  1. PIN 1 and PIN 2 from the driver connected to red and white terminals of the dc motor.
  2. The blue wire of the motor to Arduino 5v, green to ~3 of the Arduino, Black to the GND of Arduino and yellow is open. 
  3. IN1 and IN 2 pins of the driver are connected to the pin 8 and pin 9 of the Arduino.
  4. +VE and -VE of the driver connected to power supply.
  5. Vm and GND pin of the driver connected to Vin and GND of the Arduino. This is used to power the Arduino board
  6. The wipers of the potentiometers connected to pins A0 and A1 of the Arduino. The other two pins of the potentiometer to 5V and GND.

Here’s the Arduino circuit connection diagram:

The total Cost of assembling the ventilator is less than KES 20, 000 .

For commercial production or incase one needs us to assemble the ventilator for them you can reach us on below contacts

“Wanjiku” Ventilators

The stark reality of the COVID-19 pandemic has exposed the cracks in health care systems to adequately provide support to the affected patients. 

We realize the importance of ventilators as critical for the care of people with lung failure, one of the complications suffered by patients with severe COVID-19 attacks. The scarcity of ventilators is worsened by the fact that hospitals have to reserve ventilators to treat non-COVID-19 cases such as heart attacks, strokes and other emergency cases even at this time of the pandemic.

While we appreciate that the time at hand is not adequate to develop a fully compliant ventilator based on the government specifications, we believe that developing a low-cost portable automatic respirator with minimum features available to Wanjiku would save lives. Among other features, the machine should have invasive and non-invasive feature, and supports 400-700 mL tidal volume, with a continuous working capability for 2-3 days. Furthermore, any innovation must be attentive to the needs of the larger group of the population as opposed to the few. 

To tackle this imminent shortage, at DewCIS we envision a simply home-made ventilator, a mechanical breathing device that is able to blow both air and oxygen into the lungs. Rather than reinventing the wheel, our innovation is to reuse locally available parts to assemble a ventilator. Our vision is to empower every homestead to own a ventilator at minimum cost, using a simple one-page instruction DIY manual.

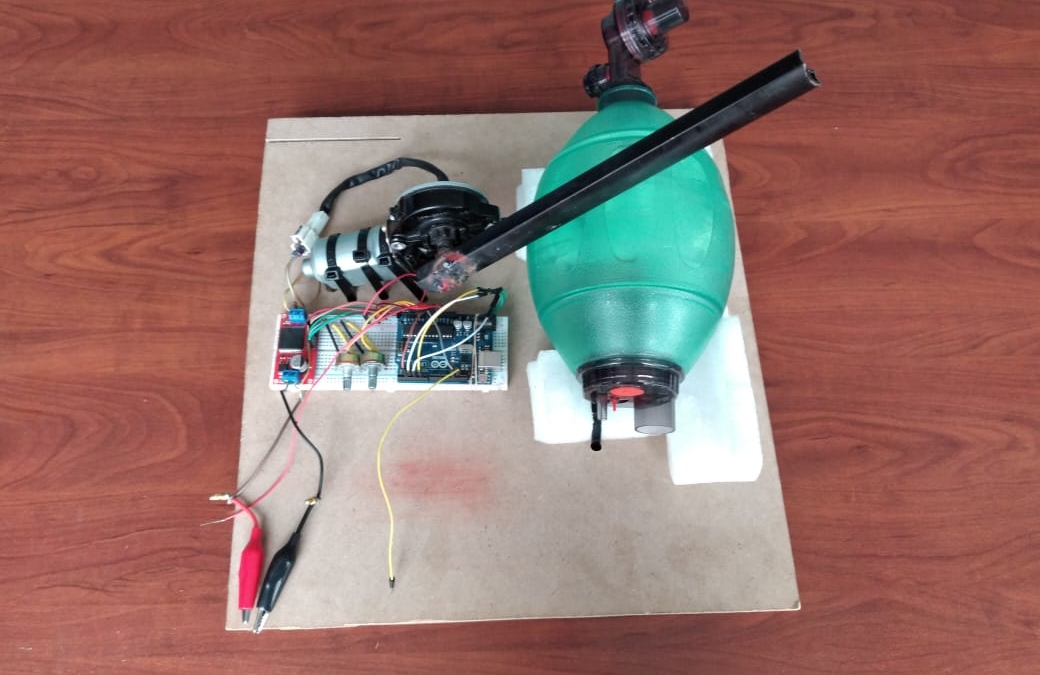
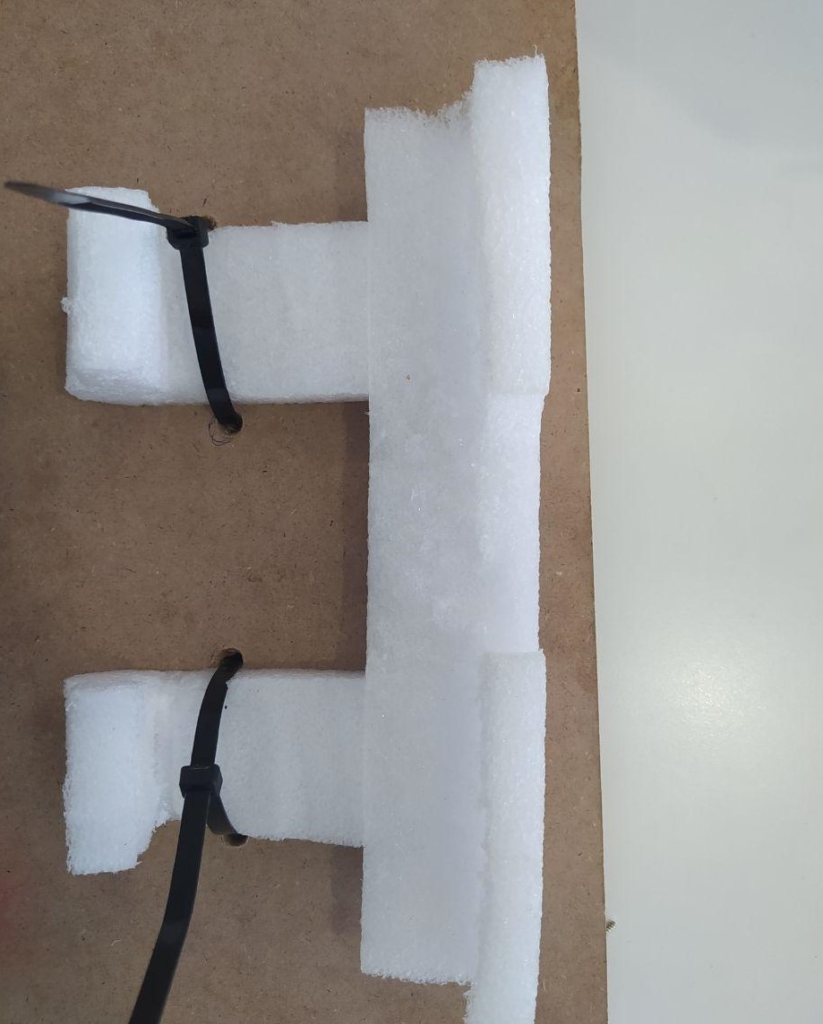
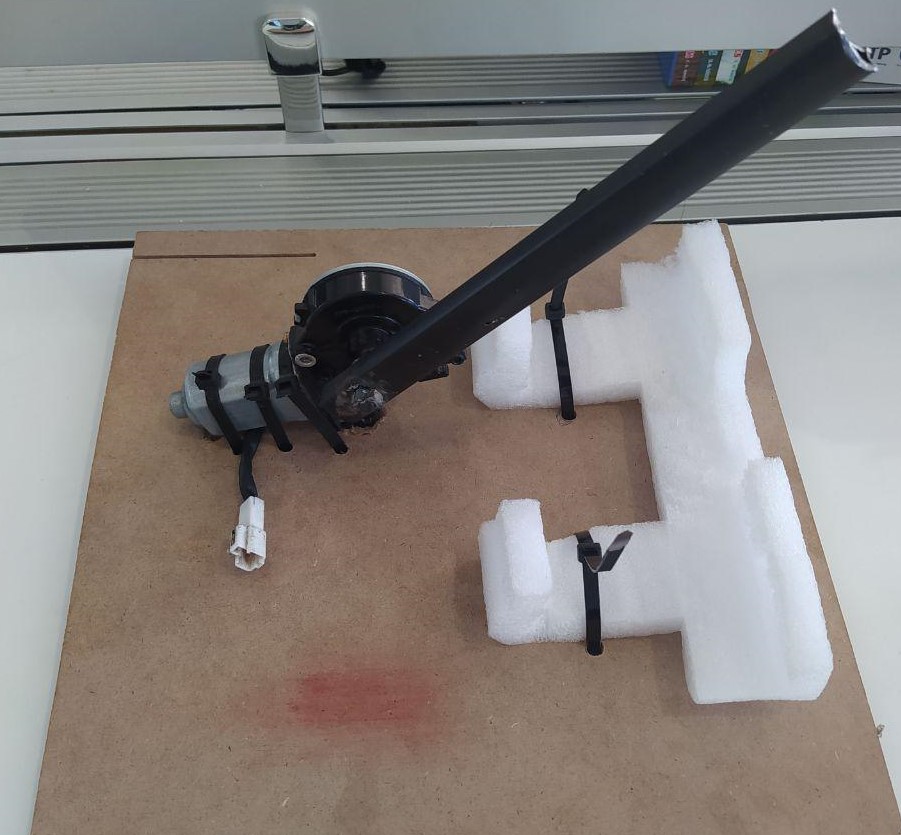
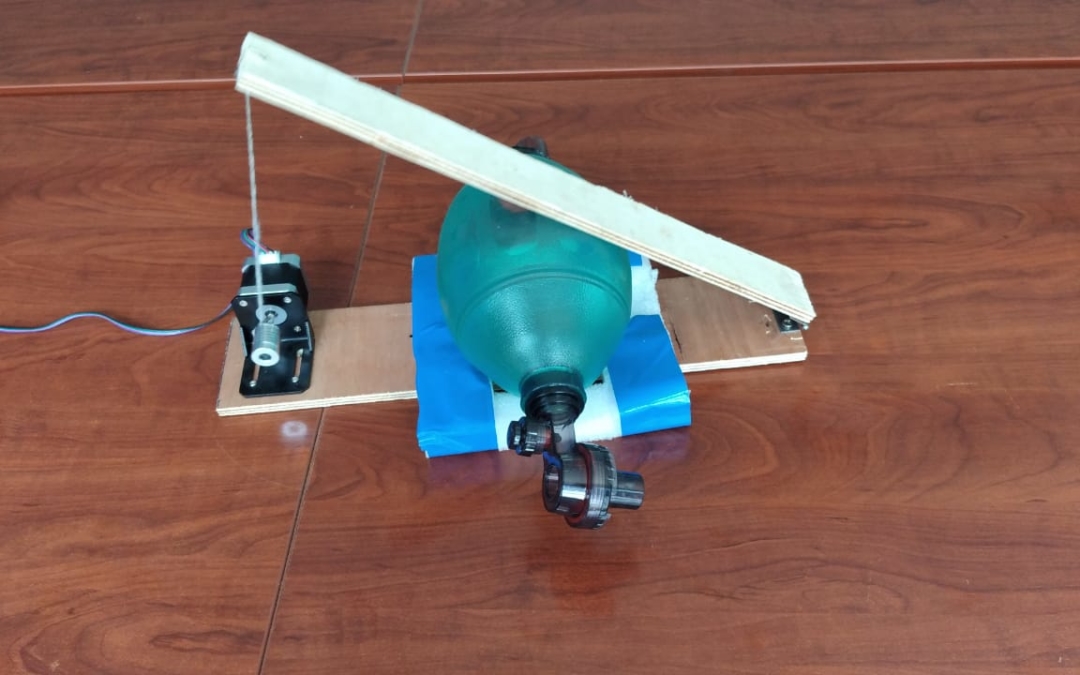
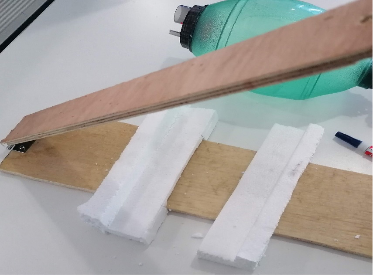
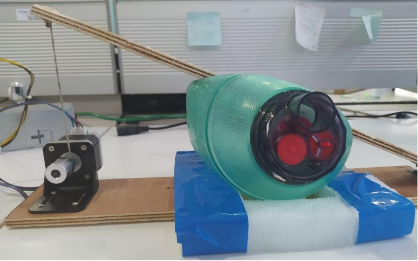
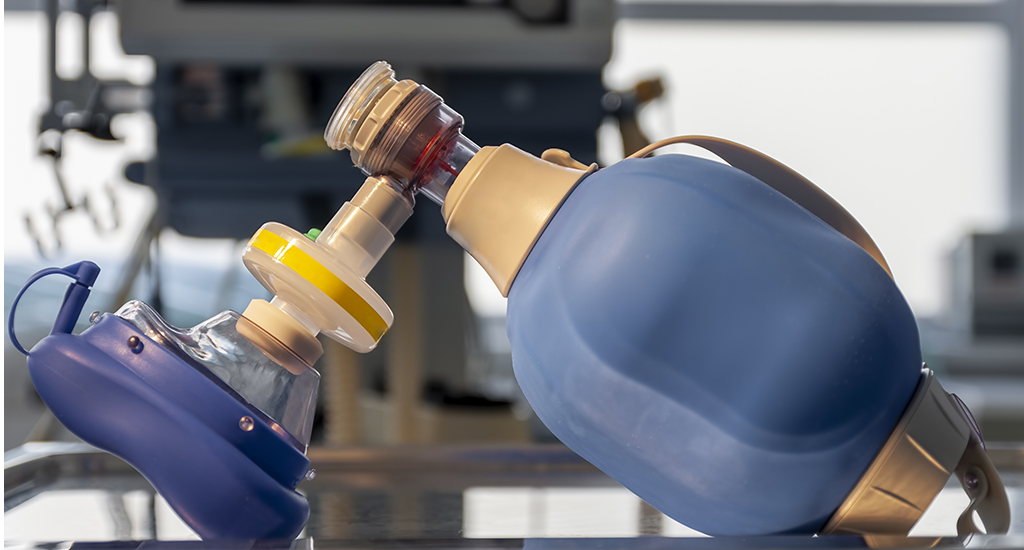
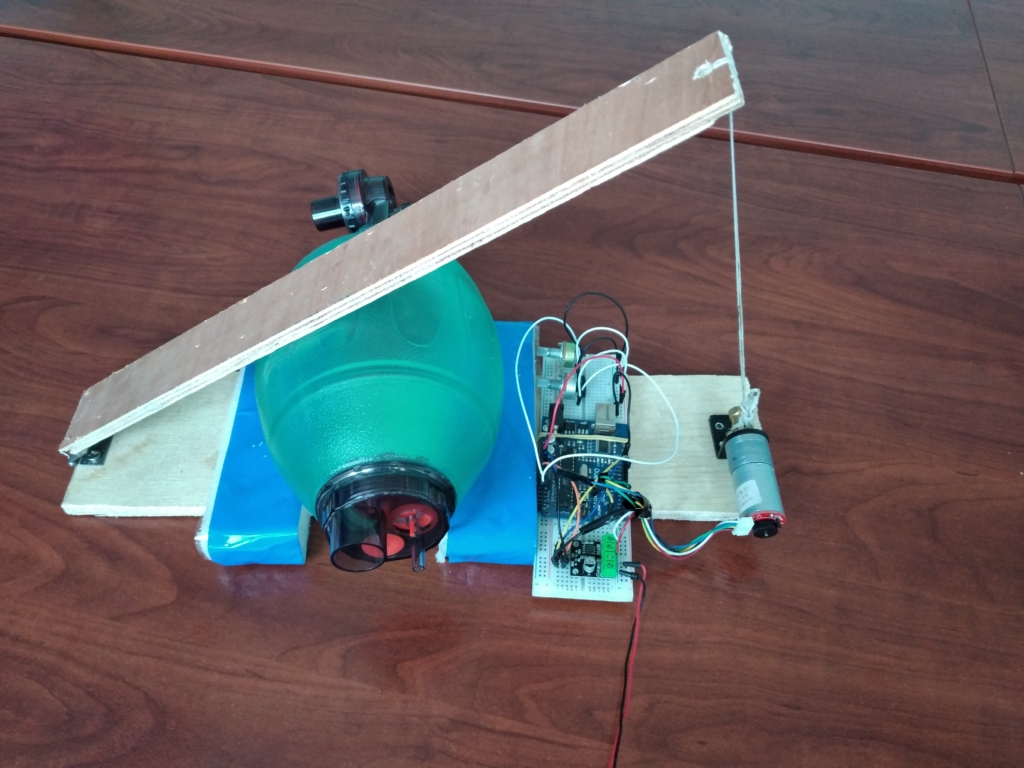
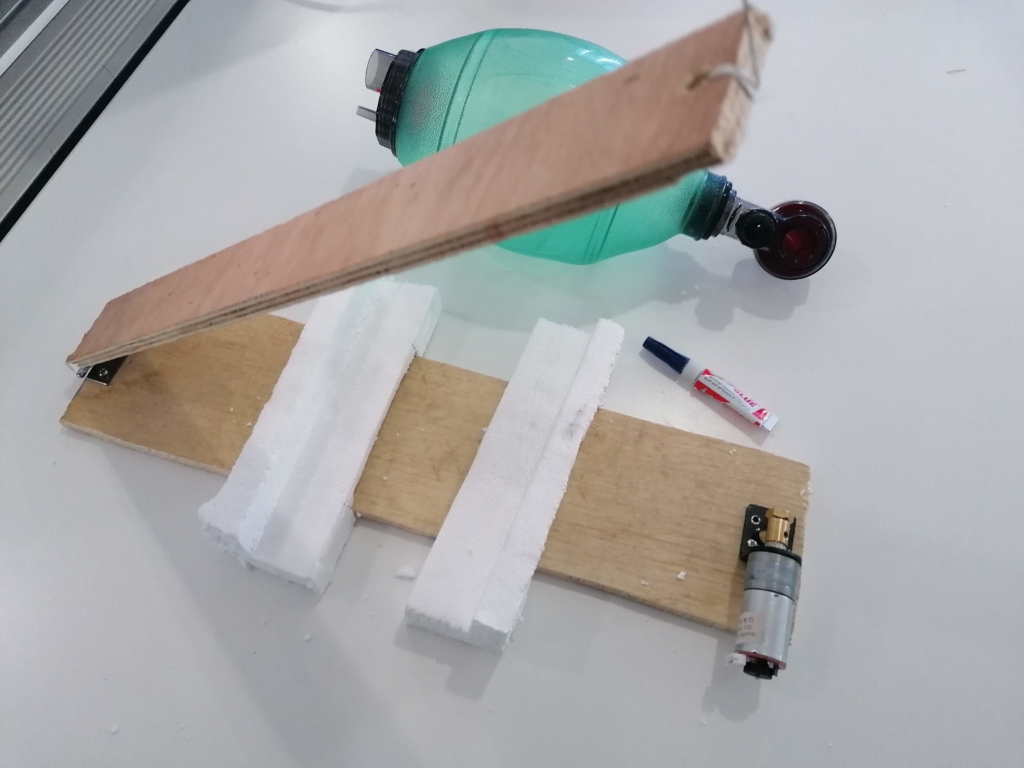
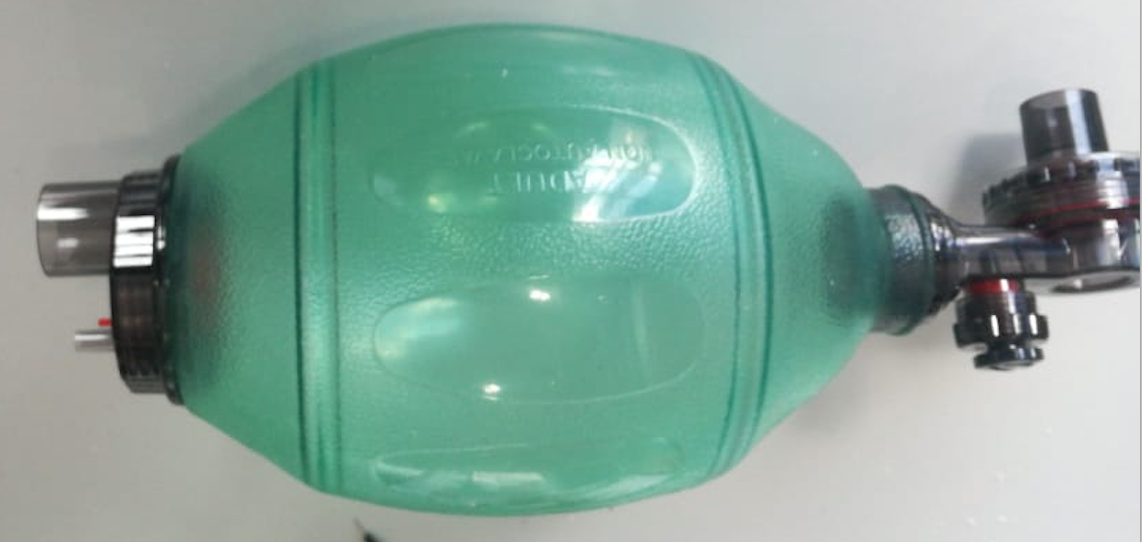
The device is made of an automatic motor pulling a tough string pulley tied to the board, which then squeezes the bag-valve mask, often called  ‘Ambu Bag,’ used for resuscitation in emergency situations, to push oxygen and air into the lungs.

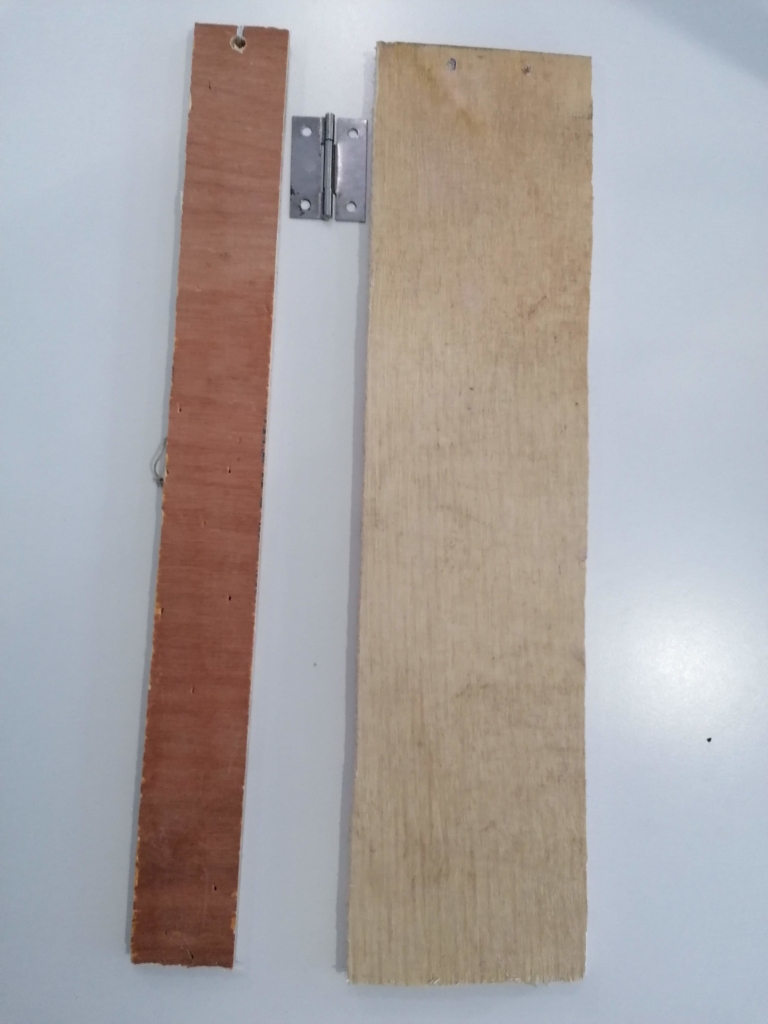
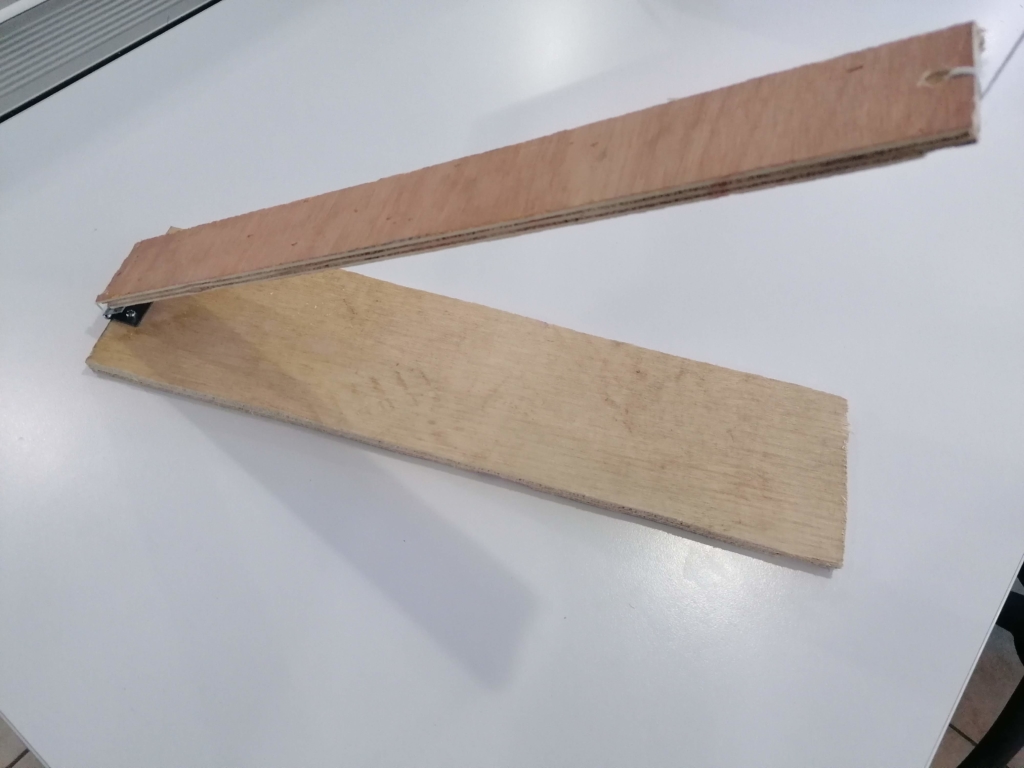
 Assembling “Wanjiku” Ventilator, I Prototype

The device can be assembled from locally readily reusable parts, and consumer off-the-shelf components

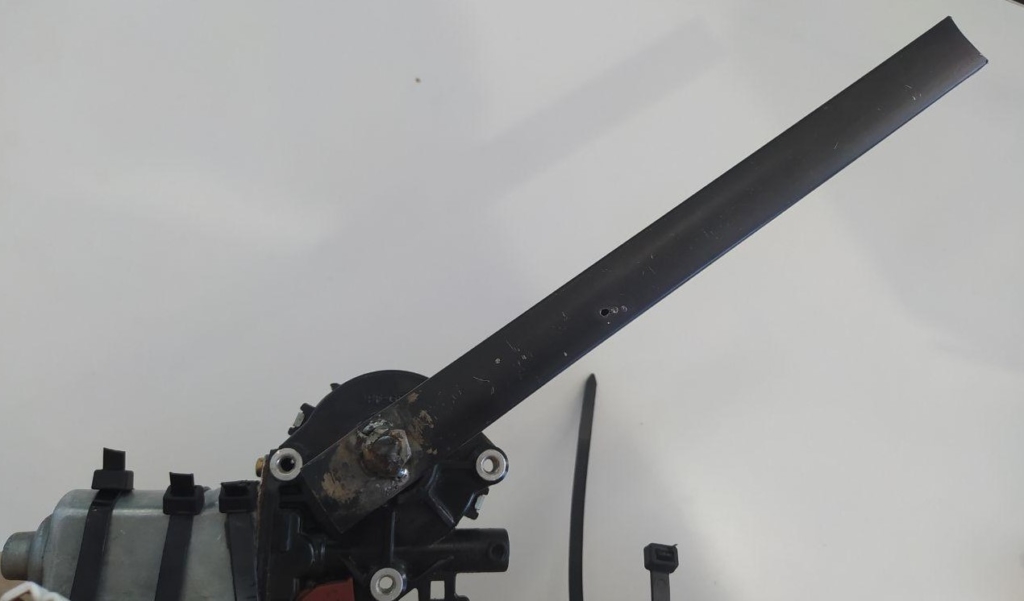
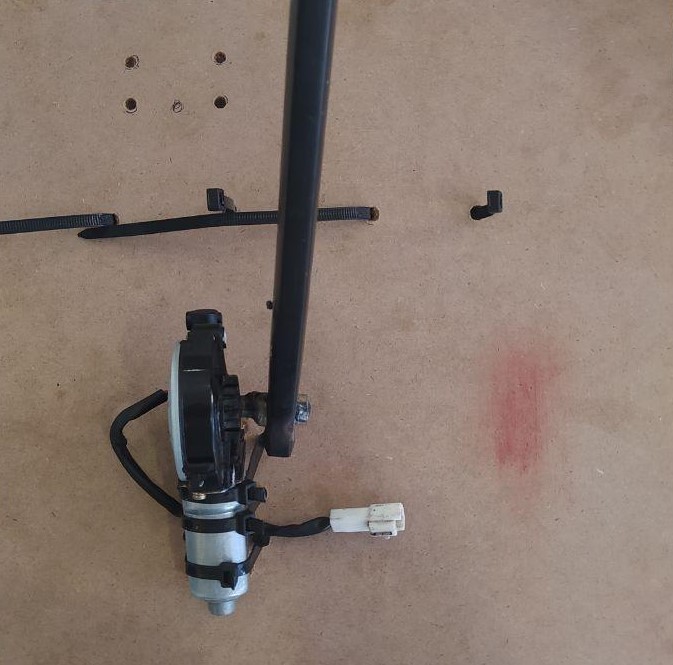
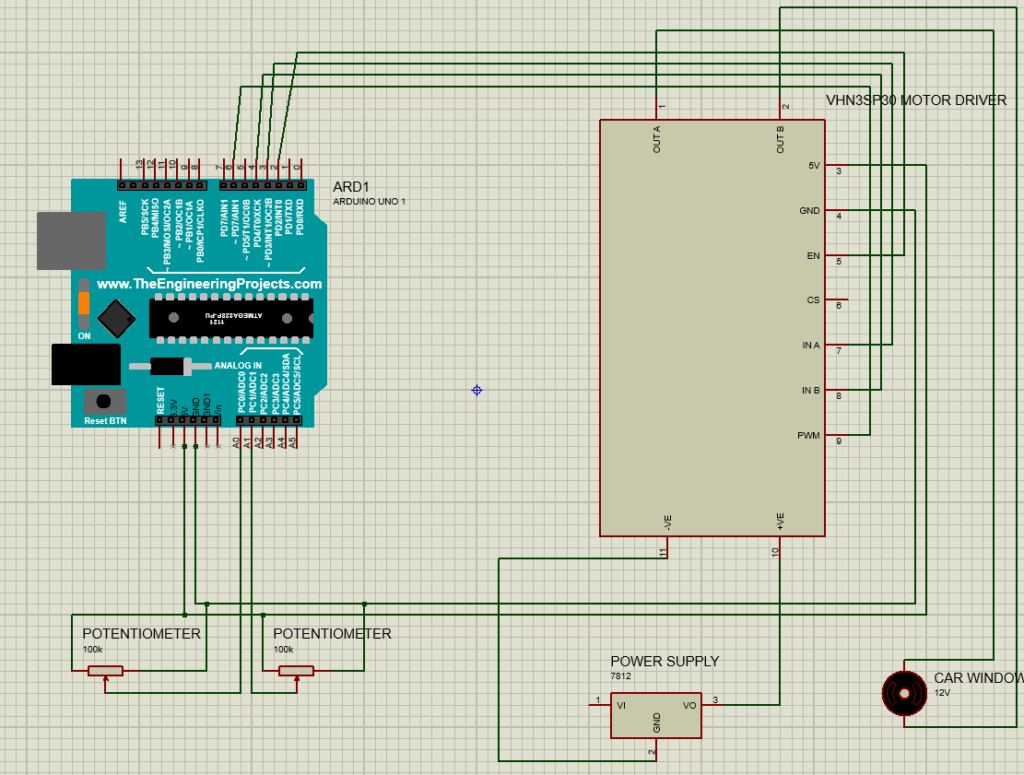
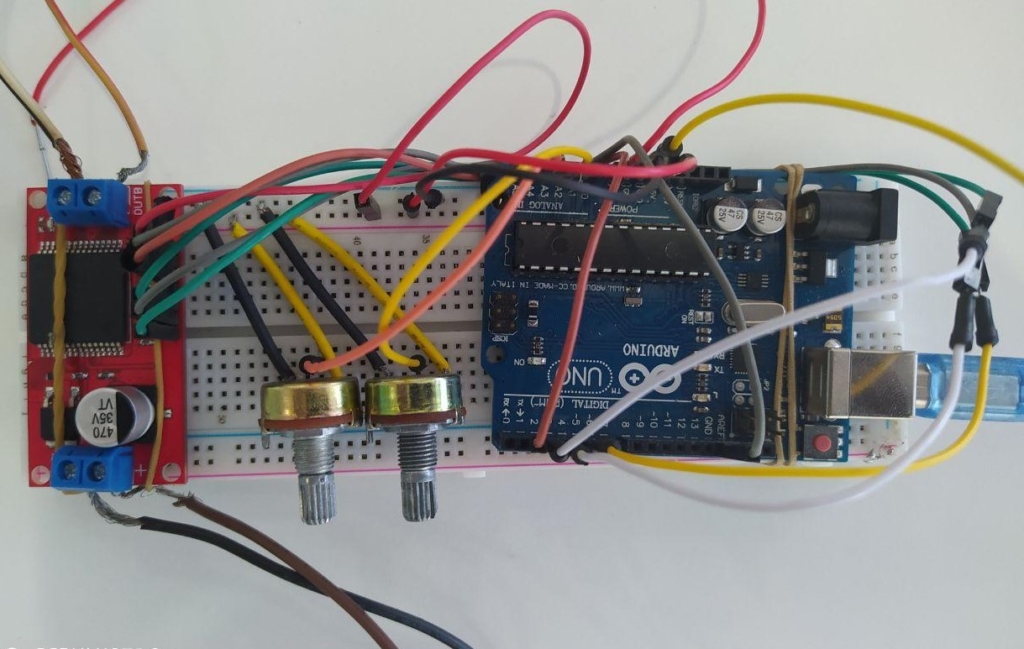
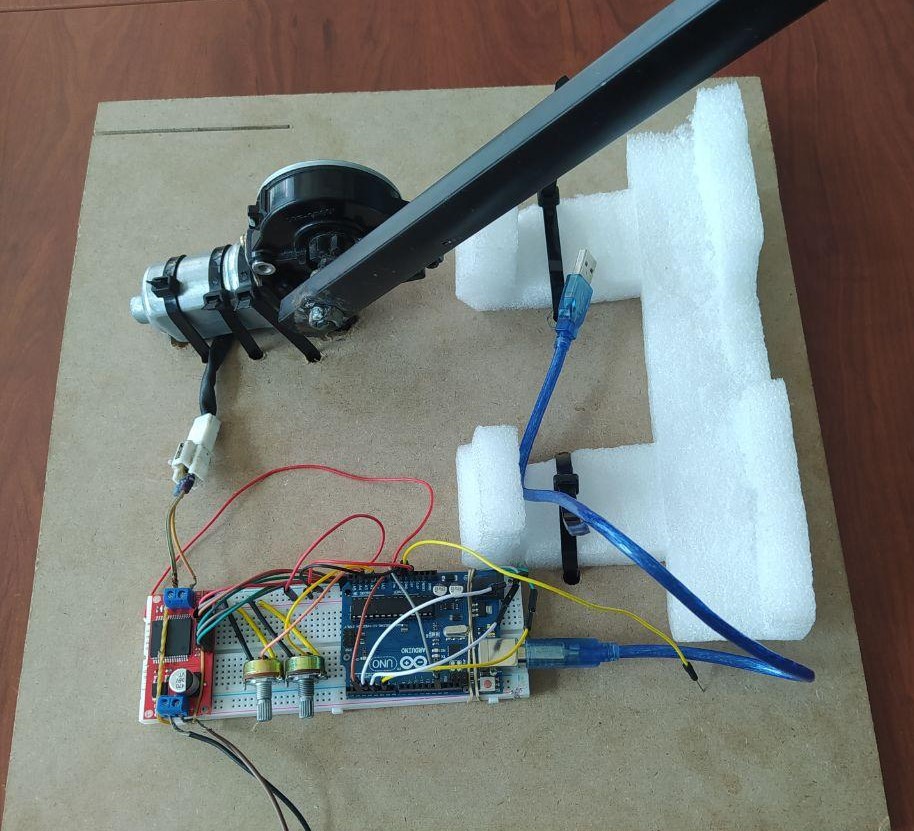
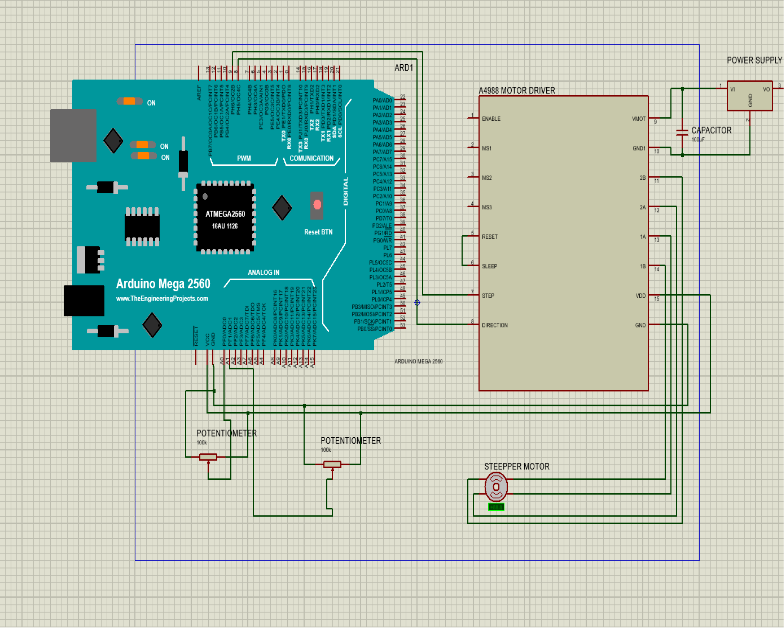
Motor & Motor ControllerA basic direct current (dc) motor with 7 kg torque is preferable. A car wiper motor would do. The motor controller gives the various modes of operating the motor. 
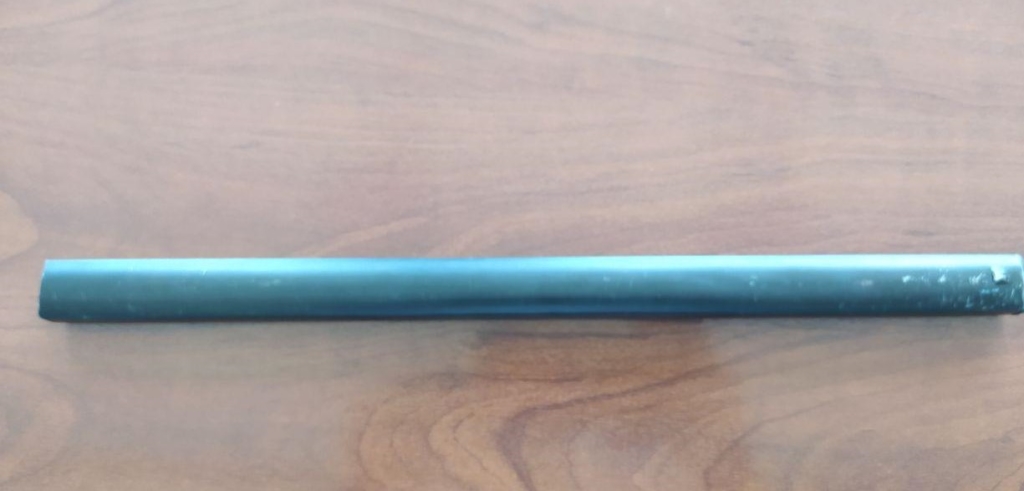
Tough string1-meter long tough nylon string, easily available from a used clothe
Bag-valve maskoften called  ‘Ambu Bag,’ used for resuscitation in emergency situations, available at local chemists 
12V direct current (dc) supplya car battery would do, an old computer power supply module or an adaptor for the 240V alternating current (ac) supply
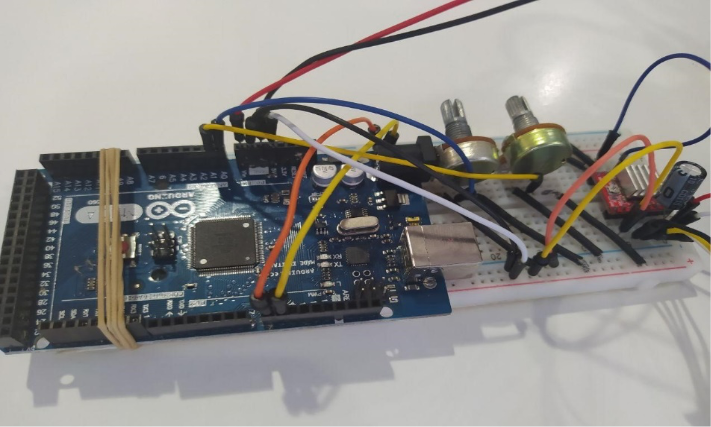
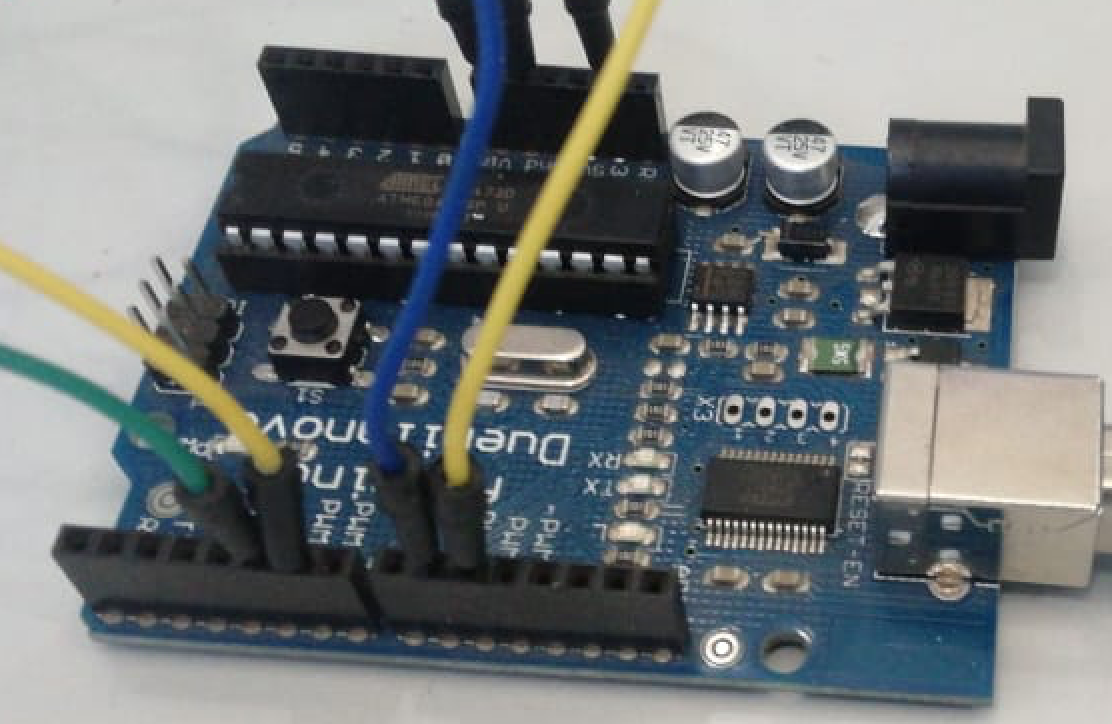
Arduino MicrocontrollerSupports programmable features of the apparatus. 

Other parts including casing can be crafted at home or from local jua kali kiosks.

This Wanjiku ventilator is portable, and therefore adoptable in villages and other low cost residential areas without reliable power supply, and is inexpensive enough to scale up in bulk production. In dire situations, an ingenious 4-way valve splitter can be used to serve upto 4 different patients.

Future models & improvements

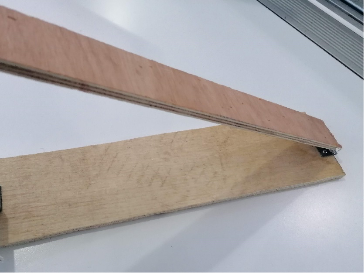
  1. Craft a more durable base and casing to offer sturdy mechanism.
  2. Introduce gears and pulleys for a smooth air flow and eliminate jerking.
  3. Program the motor motions to allow supports of a range of tidal volumes.
  4. Include user interface to allows selection of preset inspiratory:expiratory ratios.